Order a Short Code
If you previously added codes to your cart before logging in, those codes will remain there. After logging into the application, follow the process below to order a short code.
Note:
- Any labels with * indicate the mandatory fields that are necessary to proceed.
- For some program types, a verification in progress warning is displayed. The discount associated with the program type will only be applied once the verification is completed.
- From the left-side navigation menu, click Order a Short Code. To order the codes successfully, you must go through three stages.

Checkout – Cart Tab
- On the Checkout – Cart tab, scroll down to the Add Codes section.
Important: The Add to Cart button is specific to the code (or section) associated with it. For example, clicking the Add to Cart button below Generate a Random Short Code will not automatically add any selections made via the Search for a Select Code section.
Search for a Select Code
- In the Add Codes section below the Search for a Select Code, type any combination of letters, numbers, and up to two wild cards (*) in the provided search box.

- Click the Search icon (
 ) in the provided field or press Enter on the keyboard.
• If the code is available, a message "Congrats! <######> is available!" displays.
• If the code is not available, a message "Sorry, <######> is not currently available." displays. - Click the Add to Cart button to add the code to the cart.

- If you wish to purchase similar codes, click on any code from the Similar options list to add it to the cart.
Generate a Random Short Code
- In the Add Codes section below the Generate a Random Short Code, enter or click the spinner to increase or decrease the number of random codes you desire in the field "I need <#> random shortcode."

- Click Add to Cart. The added codes can now be viewed inside the cart.
Cart Details
Short Codes added to the cart are reflected in the Cart Details section.
Note: If the intended usage of the short code(s) is going to be selected as Parked on the Application tab, then the Term selection must either be 3-Month, or 6-Month. Parked short code(s) cannot be leased for a 12-Month term.

- If you are unsure about purchasing a code and do not want to remove it from the cart, uncheck the checkbox associated with the short code below the Include column.
- To remove a code from the cart, click the delete icon (
 ) at the end of the row.
 - By default, when a short code is added to the cart, it is on a 3-Month lease term. You can change the lease term to be either 3-Month, 6-Month, or 12-Month.
Redeem Promotion Code
Promotional discount codes can be redeemed via the Promotions section at the bottom of the Cart page.
- Enter the code in the Promotion Code field below the Promotions section.
Note: Only one code can be redeemed per order.

- Click Redeem. If the promotional code is valid and applicable to the items in your cart, the discount(s) will be applied in the Cart Details section at the top of the Cart page.
- You can see the redeemed promotion code under the Redeemed Promotion Code section. To remove the promotion code, click the delete () icon.
3. Click Next to proceed or Clear Order to clear the entries.
Checkout – Application Tab
This tab is for entering the information about the CSC Registrant who is the primary point of contact for the organization that is leasing the short code(s) on behalf of the Brand Client.

- CSC Registrant - Enter or select the address of the primary point of contact of the organization leasing the short code(s) on behalf of the Brand Client. By default, this section is populated with the contact data listed in your profile. You can manually update the data in this section or choose a saved address by clicking the Choose a Saved Address button.
-
Intended Usage of Short Code(s) - Select one of the following options which describe the purpose of the short code(s) lease:
-
Active – This is the typical usage of a short code. Active short codes are leased with a specific brand client and use case in mind. When a short code is leased as active, you must provide information about your messaging partners. An active short code cannot be subsequently updated to demo or parked usage. In addition, if an active short code is transferred, the brand client data does not transfer with the short code, and the account that accepts the transfer will need to vet the brand client within their own account and then associate that brand with the short code.
-
Demo – Demo short codes are used only for limited promotional, marketing, or testing purposes. While they are provisioned, the expectation is that a demo short code will not be advertised or widely used by wireless subscribers. Brand client information cannot be provided for demo short codes. A demo short code cannot be subsequently updated to parked usage, nor can it be transferred to another account.
-
Parked – Parked short codes do not yet have designated brand clients. This is a good option to use, for example, if you don’t have complete brand client information yet, or if that information is not yet successfully vetted. Parked short codes cannot be provisioned. Brand client information cannot be provided for parked short codes. Parked short codes cannot be transferred to another account.
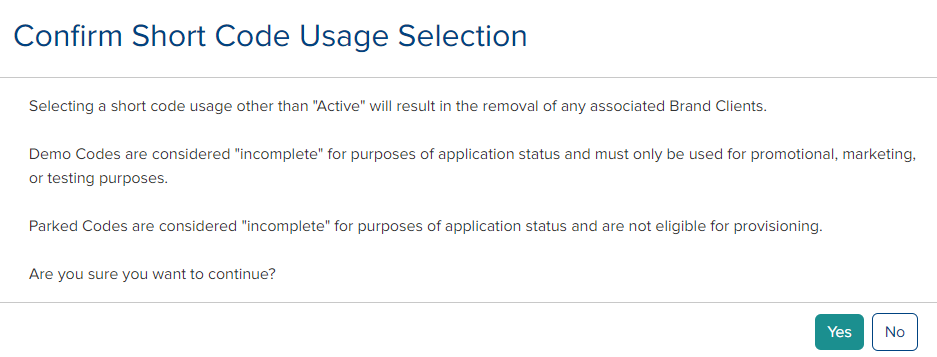
Note: A Confirm Short Code Usage Selection dialog appears when you choose Demo or Parked options. If any Associated Brand Clients have already been selected, they will be removed if you change the usage to Demo or Parked when you click Yes to confirm your selection.
-
-
Associated Brand Clients - From the Brand Clients* dropdown list, select the vetted brand client associated with the short code. These are the brands whose message content is being sent to wireless customers. If your brand client isn’t included in the list, it may not yet be included in your account’s Brand List or it may not yet have received a successful vet status. See My Brands to add a brand.
- Content Provider - A Content Provider is an entity that has a contractual relationship with the brand that sends messages to wireless subscribers. In this section, you should provide the information for the point of contact at the Content Provider. Enter the following information:
- Organization Name*: Name of the Content Provider Organization
- Federal Tax ID (##-#######)*: Federal Tax ID of the content provider organization
- URL*: website URL of the content provider organization
- First Name*: First Name of Content Provider Organization point of contact
- Last Name*: Last Name of Content Provider Organization point of contact
- Phone Number*: Phone number of Content Provider Organization point of contact
- Extension: Extension number is applicable
- Email*: Email address of Content Provider Organization point of contact - Direct Connection Aggregator - Select an Aggregator from the dropdown. Direct Connection Aggregator will connect your short code messaging applications to wireless service providers, so your messages can be delivered between the application and wireless subscribers.
Note: This service is not included in your short code lease. You will be charged an additional fee, as negotiated with your selected partners. - Application Service Provider - Enter the name of the Application Service Provider in the provided field. An Application Service Provider will work with you to define your short code messaging application which defines the interactions with wireless subscribers.
Note: This service is not included in your short code lease. You will be charged an additional fee, as negotiated with your selected partners. - Are these codes for Political Campaign - Select Yes or No.
- If you select Yes, select the Campaign Type from the dropdown.
- If the Campaign Type* selected is Federal, enter a valid FEC ID in the provided field.
Note: The FEC ID is a unique identifier for the political campaign. An FEC ID is 9 alphanumeric characters, starting with C, H, S, or P.
- For all other Campaign Types (Local/Other/State/Tribal), enter the Filing URL or Other Identifying Information in the provided field.
Note: Use this space to provide identifying information about the political campaign. Alternately, you can indicate that additional information will be sent to the Short Code Registry separately. An email notification will be received upon approval of the Political Campaign.
4. Click Next.
Checkout – Payment Tab
The Payment tab displays the codes and the order amount and collects payment information. You can navigate to the Cart or Application tab by clicking the corresponding tab.

Payment Information
- Select Pay Now or Pay Later. If you choose Pay Later, you may not be able to use your codes until the payment is completed, as the carriers require a sales receipt, which is only issued when payment is complete.

- Use the Pay Now option to use your code(s) immediately.

- If you have an existing credit card or ACH, you may select that, or if you wish to enter a new credit card or ACH, select New Payment Method.
- To add a credit card, select the option.

- Enter a description for your card in the Description field. This is an optional field.
- From the Card Type drop-down, select Visa, Master Card, Discover, or American Express.
- Enter the Credit Card Number in the provided field.
- In the Expiration Date section, select the Month and Year of the credit card from the drop-down.
- Enter the Card Verification Value (CVV) in the provided field.
For your safety and security, we require that you enter your card verification number. For Visa, MasterCard, and Discover cards, the card verification number is the last 3-digit number located on the back of your card on or above your signature line. For an American Express card, it is the four digits on the front above the end of your card number.
- Select the Add Card to Profile after Checkout check-box to update your credit card profile with the provided credit card information.
- Select the Set as Default checkbox to set this card as your default credit card for making payments. - To add an ACH account, select the option.

- Enter the account holder's name in the Account Owner Name field.
- In the Account Type drop-down, select either:
> Checking
> Corporate Checking
> Savings
- In the Description field, enter a short description of the account. This is optional.
- Enter the Account Number in the provided field.
- Re-enter the account number in the Confirm Account Number field.
- Enter the Routing Number (9 Digits) in the provided field.
- Enter the Bank Name in the provided field.
- Enter the Maximum Payment Limit in the provided field. It is the highest amount that iconectiv/Short Code Registry is allowed to debit from the account for a single payment.
- Select the Add Payment Method to Profile after Checkout check-box if you wish to save the provided ACH account information as a payment method for future use with your account. You can subsequently update and/or remove this or any other saved payment method on the My Account > Payment Methods tab.
- Select the Set as default checkbox to set this ACH account as the default payment.
Setting this as the default payment method indicates that this payment method will be used for auto-renew.
- Click the Consent check-box for iconectiv to make ACH withdrawals from the specified account for payments to the Short Code Registry and not exceed the amount specified as the Maximum Payment Limit. -
If you have credit on your account, you can use it to pay for a short code.
- To apply the payment, click the Apply Credit on Account checkbox.
- If an amount is due after applying for credit, pay it with an existing credit card or ACH or add a New Payment Method.
- To add the newly added credit card to your profile after checkout, click the

Billing Information
- This section displays the account's billing address. If you wish to change this to one of the saved addresses, click the Choose a Saved Address button. You may also update the information in the respective fields.

Purchase Order Number
- If you have a purchase order number, enter it in the field provided below the Purchase Order (Optional) section.

Auto-Renew
- To enroll for auto-renewal, read the terms and conditions and enable the checkbox below the Auto-Renew section.
Note: Short code(s) with intended usage selected as Parked cannot be enrolled in auto-renewal. These short code(s) must be manually renewed.

Monthly Billing
- To enroll in monthly billing, read the terms and conditions and enable the checkbox below the Monthly Billing section.
Note: This section is only enabled if your account is enrolled in Monthly Billing. To enable your account for Monthly Billing, contact Customer Support.

Agreement
- Read and select the Terms and Conditions checkbox.

5. Click Complete Order to finish the order or click Clear Order to cancel the order. Once the order is completed, a Thank You message is displayed.
- Click on the Order ID link to open the Receipt for the order.
- Click the Download Receipt link to download the receipt as a PDF.
Note: The receipt can be downloaded for the codes that are paid. If you have decided to pay later, you can download the invoice by clicking the Download Invoice link. - Click on the Short Code to open that short code on the My Short Codes - Short Code List page.
